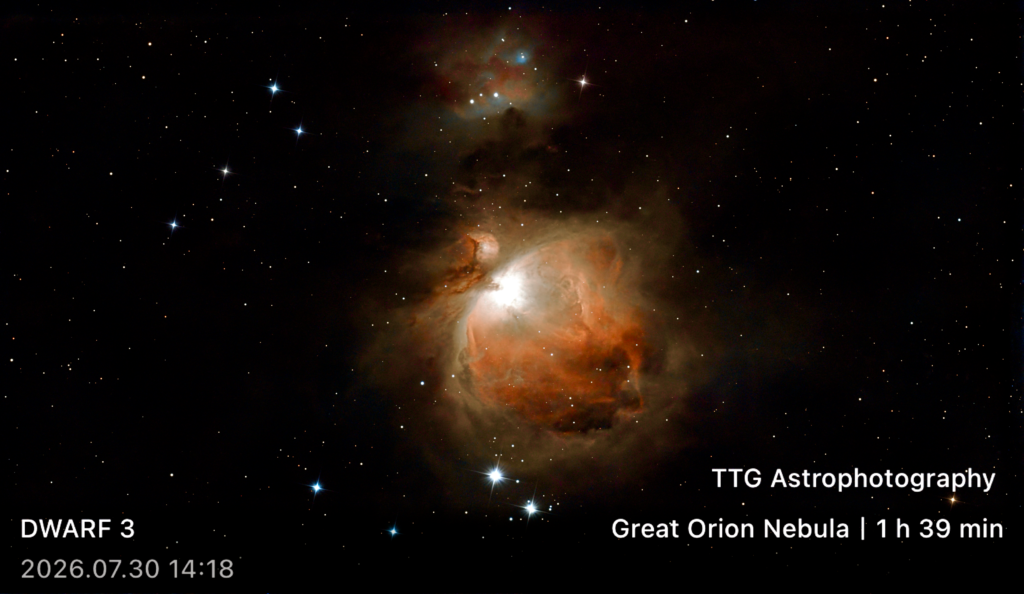
Hi all,
It’s now over a month since I got my Dwarf 3, and I must say the experience has been amazing. Ignoring the issue I had with the initial unit I received, as that was most likely due to transport and the way delivery guys handle your packages. Dwarflab has been really supportive in reviewing the issue and replacing the D3 under warranty.
I want to use this post to highlight a few of the things I learned by using the D3 so far. Not a detailed tutorial, but just a high level overview.
Although the Dwarf 3 has additional features, like Bird watching, Panorama, other daylight functionality (burst and time-lapse) and even a UFO tracking mode… I have only been using the telescope in Astro(nomy) mode.
The main 2 submodes in Astro are leveraging the Telelens and the Wide angle lens. So far I’ve also only used the telelens, as that is what is used for capturing galaxies and nebulae as close as you can get.
Additionally to the normal telelens mode, the D3 is also capable of doing mosaic compilations, where the built in software of the app will stitch multiple images together to enlarge the field of view. Something I also still need to test out, as it can come in very handy to capture larger objects like the entire Veil Nebula. So far I’ve only captured the western part of it, being NGC6960. Using mosaic mode, I would be able to capture both eastern and western part of it in one image.
One other feature I also left aside for now is the scheduling mode. The scheduling functionality in the Dwarflab app allows you to position the telescope, dial in the settings like EQ mode, and tell it to capture 1 or more targets through the night, unattended. This would allow me to go to sleep and find the collection of targets it captured during the night when I wake up in the morning. However, because of the weather in the Netherlands, and especially the fact that it can change rapidly through the night, I lack the confidence of leaving my precious Dwarf outside without checking up on it or checking the sky from time to time. Heavy rain and wind wouldn’t do much good, especially for the inside electronics. Some moisture or condensation would obviously be fine, but the Dwarf 3 is not rainproof.
Looking at the sessions I’ve been doing so far, there are a couple of things which really make the Dwarf 3 one of the best purchases I’ve done since a long time. My nerdiness makes me buy a lot of gadgets and tech things all the time, but like I said in my initial impression, the ease of use and the affordable introduction into astrophotography is what really makes this telescope worth the money.
The last few weeks allowed me to get more familiar with the large variety of deep sky objects out there, learn more about each object and enjoy the action of capturing them myself. Even if the process is almost fully automated, including the post-processing with Stellar Studio and Megastack (built in functionality of the app), it still generates joy when you can add a new target to your list. I see it as a Pokemon Go style game… to catch them all.
I even decided to print one of the targets I captured, M31 Andromeda, and looking at the result I’m quite happy with it. Both the quality of the print itself, as the resolution is fine for me. Normally, for larger prints like posters or bigger wall mount pictures, a DPI (dots per inch) of 150 to 200 is recommended, which I did not get for the size of this print.
DPI is calculated by dividing the Pixel Dimension by the Print Dimension (in inches).
The max resolution of the Dwarf 3 is:
- Tele: 3840×2160
- Wide: 1920×1080
For the M31 print I chose 80 x 45 cm, or in inches: 31.5 x 17.72 in. This gave me a DPI of 121.9 on both height and width. A bit below the recommendation of 150, but turned out to be enough for a wall frame in my opinion. Knowing that more total time on target would probably have improved the image even more (here only around 2 hours of total integration time, post-processed in Stellar Studio and iOS Photo’s app).

On the more general side of things there is one very important thing I realized throughout the different sessions I did so far, and that is to make sure to get a precision of 0 degrees deviation on the polar alignment in EQ mode. It only takes a couple of minutes to do the EQ alignment anyway, and spending a few more to make the difference between 1 or 2 and 0 degrees deviation seems to make a big difference!
The Dwarf 3 is an amazing product, but regardless of all the amazing functionality Dwarflab put in it, it does have its limitations. No surprise there, but this means that you really need to leverage the tools Dwarflab provides us with, and since a few updates you can now tell it to aim for more precision on the polar alignment . 4 or less degrees of deviation in EQ mode allows you to start the capturing session, but clicking that “be more precise” button to guide you making small adjustments to the tripod is really worth it to maximize the tracking stability and avoid star trails due to field rotation.
The Dwarflab Mini tripod has been doing a great job for me. During my investigation of the issue I had with my first unit, I tried other tripods and even weight bags to stabilize it more, but the outcome was the same. I find the Darflab Mini tripod sturdy and stable enough and once I got the replacement for my D3, I was able to get 98% success on the first 100 subs. After that some lightnings far away in the sky caused a few subs to be flagged as failed, but that was not impacted by either the D3 or the tripod limitations.
One thing I also realized, after reading the manual again, is that it’s important to wait 30 seconds after completing the EQ alignment and GoTo, before starting the capturing session. This to allow the Dwarf to stabilize its tracking.
Wait for stable tracking: After using GoTo, wait 30 seconds for stable tracking. Stacking may fail if stars have trails due to unstable tracking, wind, or vibrations.
https://help.dwarflab.com/en/docs/Trouble-Shooting-Guide-For-DWARF-3-Users
Another thing which I learned is that, in the current firmware, the Dwarf 3 takes an extra picture every 10th sub and discards it. The reason for it is what we call ‘Dithering’ in astrophotography. Dithering is slightly moving the telescope a few pixels, to counter imperfections in the sensor (hot or dead pixels, dust, uneven sensor sensitivities, etc). I read somewhere that it was originally every 4th sub, and changed to every 6th sub in one of the previous firmware updates. However, in my experience I see it happening every 10th sub. For instance sub 60 completes, but stays at ‘current 60’ while doing another exposure. I’ve been monitoring the stacking and saw this happening every 10th, 20th , 30th, … sub.
UPDATE after confirming with Dwarflab: Dithering is done every 6 shots for exposures under 60 seconds, and every 10 shots for exposure of 60 seconds or above.
The mini tripod does include an indicator for both the horizontal as well as the vertical alignment, allowing you to precisely adjust the degrees during the polar alignment. However, as it’s done with the manual lever, I decided to add a 3-way geared head to it:
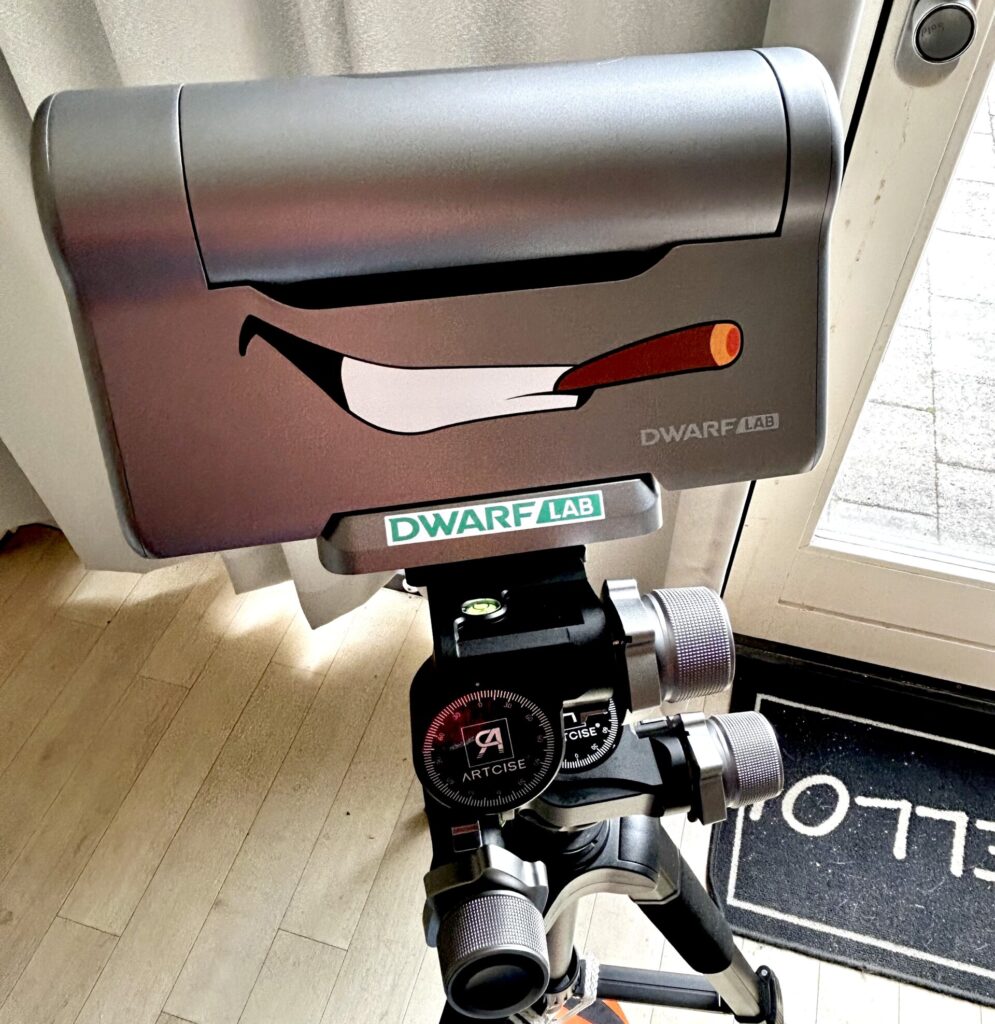
Not really necessary, but it does allow me to really fine tune the alignment and I’ve found that it makes my life a bit easier. Adding a little more precision, it allows me to hit 0 degrees deviation in only a couple of minutes, with a maximum of 2 or 3 adjustments. Same for leveling the tripod prior to starting the EQ alignment, as the 3rd axis allows for a perfect horizontal leveling. Everything to maximize the capabilities of the mighty Dwarf 3 and ensure perfect tracking!
So far, my session workflow I established is as follows:
- Ensure to have this ongoing awareness of the weather and upcoming clear sky nights. The Windy app on iOS really helps me with that as it includes a good satellite view of the clouds (and prediction for the upcoming hours in premium mode).
- Have the Dwarf battery charged after each session. I didn’t do any session which would outrun the internal battery yet, but I do have a large battery pack ready at all times if that would be needed.
- When anticipating a clear night sky, I explore my stellarium apps, like SkyView and Star Walk 2. I do prefer SkyView as it includes a nice prediction of the path the selected object will follow in the sky. Together with the camera AR functionality it allows me to nicely see the position of the object at any time during the night, helping me to select my next target. The higher the better and away from any obstruction (house, tree, …) or light pollution. Depending the target I want to shoot I may need to check Star Walk 2, as not every object is included in the SkyView database. Especially some NGC or IC objects are sometimes missing.
- Disable automated lights in my smart home environment. The house is a bit like Fort Knox here, with cameras and sensors all over the place. Last thing you want is a cat, a bat or a bird triggering one of the lights, ruining my session.
- Position the tripod and level it in all 3 axis so that it is perfectly horizontal.
- Mounting the Dwarf 3 and roughly point it towards Polaris. When I was a kid, my grandfather learned me how to quickly find Polaris. Take the 2 starts at the end of Ursa Major (Big Dipper), and draw a line extending the leg 5 times. Can’t be easier. Nowadays, it has become a native skill to look up at the sky and immediately pinpoint Polaris. To achieve polar alignment, you also need to know the latitude of your location. For Netherlands that’s 52.5 degrees from the horizontal, so for my tripod that means I need to tilt it downwards from the vertical by 37.5 degrees. Horizontally it’s just a matter of pointing the 0 degree indication of the tripod towards the direction of Polaris when I position the tripod.
- Start up the Dwarflab app, connect to the D3 which I am using in STA mode at home (so that both the telescope and my iPhone are connecting to my home Wifi), and select Astro mode and the tele lens.
- Select EQ mode and complete the polar alignment. As said ensuring I get 0 degrees deviation precision to maximize tracking stability.
- Select my target in the built in Atlas and perform the GoTo process.
- Wait a minimum of 30 seconds to allow the Dwarf 3 to stabilize its tracking.
- Dial in the settings for exposure, gain and amount of images to stack, and hit record.
- Go watch some TV Show, do a Power Nap or any other nerdy activity.
- Keep an eye on the weather from time to time… as said, I don’t trust the Dutch Weather… and enjoy watching the image stack bringing the object to life.
- When the session completes, take some Dark shots if necessary. This is important to maximize the quality of the stacked image, especially when using Megastack, to eliminate inaccuracies or interference in the image sensor. The Dwarf 3 has a tolerance range of about 8 degrees Celsius, as the impact of sensory interference is depending of the sensor’s temperature and exposure/gain settings. Hence it’s a good idea to build a collection of dark images at different temperatures for each combination of exposure/gain you are capturing with. Dwarf 3 allows to keep a collection of 100 Dark images on file.
- Select the resulting image in Stellar Studio and hit ‘auto’ to let Stellar Studio do its magic. I don’t bother too much about ‘starless’ images, as I personally do prefer the real image including all stars the D3 captured. Some people prefer reducing the stars or even get rid of them entirely, while others temporarily remove them, creating a star mask, to post-precess the nebula or galaxy separately before putting the stars back. This to avoid changing the exposure or saturation of the stars. I just stick with autoprocessing in Stellar Studio for now, which for me and my goals with the D3 does an amazing job!
- Download the uncompressed .png file from Stellar Studio and copy the .fits file link to my Mac. Love the handover functionality in iOS/MacOS for this. The watermarked image you get from Stellar Studio is around 2 MB, fine for social media which compresses the image anyway. The uncompressed .png file may come in handy if you want to print it later.
- Add the watermark in Stellar Studio, and tweak it a bit in iOS Photos app to my personal liking (personally preferring a bit higher saturations and darker background bringing the black point up) which gives me the end result to share on social media and my blog.
- Connect the Dwarf to my Mac and copy the entire folder of the session to my backup drive and iCloud. As well as airdrop the above mentioned uncompressed PNG file.
- Write a blogpost, share the watermarked image on social media….
- Go to sleep 🙂
That’s it for today! Really enjoying this new hobby and eager to learn as I go!
To endless exploration, starry nights, and a little bit of cosmic nerdiness!
TTG